
- How to: SSH into your webhost using cPanel credentials through Linux Console
- SSH to WebHost using public/private SSH keys login generated by cPanel
- Howto: Generate SSH Keys on your local computer and use with the Server
- System, Network & Disk management Linux commands you should know to manage your web server
- Common directory and file management commands in Linux
- User and Group Management in Linux – System Administration & Advanced Concepts
- Understand File and Directory Permissions in Linux – Concept and Viewing
- Change File and Directory Permissions in Linux – Terminal Commands
 In this follow up post of the System and Network Administration via SSH series, we are going to talk about users and group management in Linux (and also some modern conventions for Ubuntu operating system). When you own an VPS or Dedicated Server, then user/group management becomes crucial. In practice, all of your websites should be run by different users under different group for better security.
So, let us see how we can add/manage/delete users and groups in general Linux system. As, Ubuntu is my personal favorite for both a standard OS and web server, we are going to see some Ubuntu standards as well.
#0:Concept: User and Group Management in Linux:
The concept of Groups and Users is pretty straight forward. Everything (or better say, every process) in Linux runs under specific user and uses that user’s permissions for its proper execution. To further extend the permissions of a group (or collection) of users, the User Group concept was introduced. We know that each file, should be owned by a User. Now, another user may or may not be able to read/edit/execute that file, depending on that file’s permissions and the group of the user.
In simpler words, if we want to run a process, then it has to run under some user. Any user should be a part of a group or a set of groups. For example, when first install Linux and create the primary user, then we give a username, which becomes the User’s login. A group with same name as the username is created and is assigned as the primary group of the user. The user is also assigned to other groups depending on what the user is supposed to do.
My user name is swashata and my primary group is “swashata“. Other than that, I might be added to the following groups as well.
swashata adm cdrom sudo dip plugdev lpadmin sambashare
Therefore, I can also apply sudo command, have administrator rights, can use sambashare and so on.
What a group can do, solely depends on the model of an application. Most of the system applications like, Apache, SambaShare etc creates groups and allows user only their own group to execute them.
#0.1: Standard Linux files:
Everything in Linux is stored in a file, Groups and Users are no exceptions. We can view the following file to quickly view the current status of users and groups:
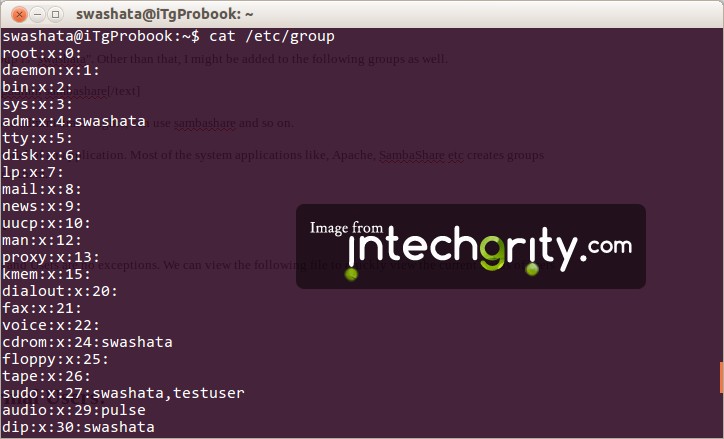
/etc/group File – Group Information:
Holds 4 information delimited by colon(:) in the following format.
group_name:x:group_id:users
Where, x is a deprecated placeholder for Group passwords.
/etc/passwd File – User Information:
It holds 7 information delimited by colon(:).
user_login:x:user_id:user_primary_group_id:comment_or_user_name:home_directory_path:default_login_shell
Where x is again a deprecated placeholder for login password.

/etc/shadow File – User Login Information:
The shadow file holds the password of the user and other login credentials. It has 8 columns delimited by colon(:) which holds the following information.
- User name : It is your login name.
- Password: It your encrypted password. The password should be minimum 6-8 characters long including special characters/digits
- Last password change (lastchanged): Days since Jan 1, 1970 that password was last changed.
- Minimum: The minimum number of days required between password changes i.e. the number of days left before the user is allowed to change his/her password.
- Maximum: The maximum number of days the password is valid (after that user is forced to change his/her password).
- Warn : The number of days before password is to expire that user is warned that his/her password must be changed.
- Inactive : The number of days after password expires that account is disabled.
- Expire : days since Jan 1, 1970 that account is disabled i.e. an absolute date specifying when the login may no longer be used.
Please read this article from cyberciti to understand (although not required) more about the shadow file.
#0.2: System Users vs Normal Users:
The very basic of the user management system includes the concept of whether the user account is being used by programs or by people.
- A system user is intended to be used by programs (applications).
- A normal user is intended to be used by people (like you and me).
That being said, the usage is not actually limited. In practice, an application can use a normal account, whereas one may assign password to a system user and can login through the shell.
It is upto the us and the program to properly create system users when necessary. Also, on a modern Linux Distro, we will not see system users listed in the login window.
The same concept holds true for System Groups as well. Typically, all users under a System Group should be System users.
#1: Adding a new Group & User:
So, we had enough theoretical explanations. Now, let us see how we can actually create and manage users and groups. Obviously, we shall use terminal commands to do the necessary. Also, these concepts are for System Administrators (SA). So, we will need su privilege to execute any of the commands. For general Linux system, we can start a root session by typing su on the terminal, whereas in debian or Ubuntu, we can either type sudo then the command or can start a root session by entering sudo su.
#1.1: Adding a new group to the Linux System (groupadd):
To add a normal group named mygroup we would execute the command:
Simple Command:
groupadd mygroup
Now, if we do a
cat /etc/group
Then the output will be something like this:
utempter:x:121:
rtkit:x:122:
saned:x:123:
swashata:x:1000:
sambashare:x:124:swashata
winbindd_priv:x:125:
gdm:x:126:
mygroup:x:1001:
Where we can see our group. Note that the group ID 1001 is automatically assigned to the group. There are a few useful parameters as well.
Parameters:
| Parameter | Usage | Example |
|---|---|---|
| -g | Used to define the group ID of the group we are creating. |
groupadd -g 2000 mygroupgid |
| -r | Creates a system group. |
groupadd -r mysystemgroup |
In Ubuntu, the GID range for System group is generally from 1 to 999 and that of normal group is above 1000. The GID 1000 is usually the primary group of the primary user account.
#1.2: Adding a new user to the Linux System (useradd):
Unlike groupadd, useradd is used for two purposes:
- Create a new user (when invoked without the -D parameter).
- View or Update default new user information.
In this tutorial, we shall not talk about the second operation. You can always do a man useradd to learn more about its features.
Simple Command:
To create a user named “myuser” we shall use the following command:
useradd -c "My User" -d "/home/myuser" -s "/bin/bash" -m myuser
Now let us see what are the possible parameters for the command and also what the parameters above did.
Parameters:
| Parameter | Usage | Example |
|---|---|---|
| -b | The base directory for the system. Defaults to /home for most of the Linux system. This is mainly used to create the home directory. If the home directory parameter (-d) is not set, then login name is concatenated with base directory. |
useradd -b "/var/www" myuser With default configuration, the home directory will be /var/www/myuser |
| -d | The path of the home directory of the user. If the path does not exist, then it is not necessarily created by default. |
useradd -d "/home/myuser" myuser |
| -g | Primary group ID or name. If not specified, a new group is created with same name as the login name of the user and the corresponding ID is assigned. |
useradd -g 100 myuser The GID 100 corresponds to a group named “users”. myuser will be assigned to that group. |
| -G | List of supplementary groups which the user is also a member of. We can have multiple groups separated by comma. |
useradd -g 100 -G adm,sudo myuser WIll make the user myuser also a member of sudo and adm group and use corresponding privileges. |
| -s | Specifies the default login shell of the user. |
useradd -d "/home/myuser" -s "/bin/bash" myuser The login shell will be bash. |
| -c | To add comments. It is mainly used as the Name of the user. |
useradd -c "My User" myuser “My User” will come as the name on the login window. |
| -k | The path of skeleton directory from where the files and directories will be copied to the home directory. Should be used with -m. |
useradd -d "/var/www/wordpress" -k "/public_html/wordpress" -c "WP User" -m A possible way to run your WordPress site with a new user and copy all files from old users at once. |
| -m | Creates the user’s home directory if it is not present. Also, copies everything from skeleton if it is specified. |
useradd -m -c "My User" myuser The simplest way to create users with all default settings. |
| -r | Creates a system user with following three characteristic:
|
useradd -d "/home" -G sudo,adm,swashata -c "FTP User" -r ftpuser Perhaps a way to create a FTP user? (Give us your thoughts) |
| -u | Assign an ID value manually to the user. Has to be non-negative integer and unique. We do not however, use this option for system users. So, typically the range starts from value greater than 999. |
useradd -u 2000 -m myuser |
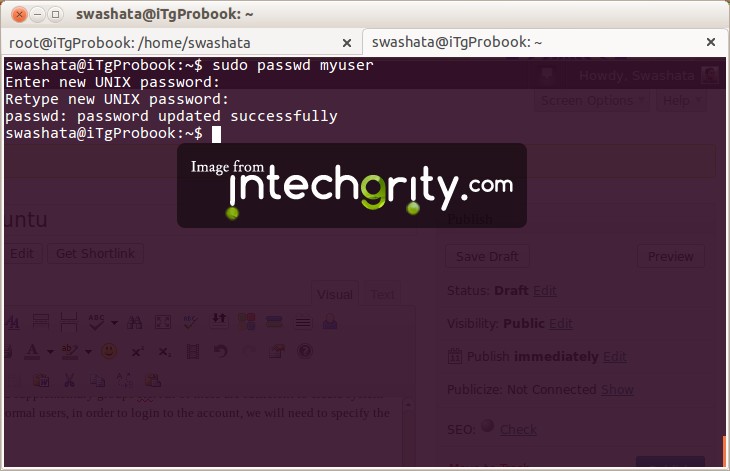
#1.3: Assigning Password to users:
So, uptil now, we have created an account for a new user, assigned primary group and supplementary groups etc. All of these are sufficient to create system users, as by default we do not want system users to have passwords. But, in case of normal users, in order to login to the account, we will need to specify the password as well. Let us see how we can do this.
Simple Command:
To change the password of the user “myuser” we shall use the following command:
passwd myuser
It will then prompt for password. Enter it and you are done.
Parameters:
There are a few interesting things which we can do with passwd as well. Basically with all the parameters, we properly modify the /etc/shadow file.
| Parameter | Usage | Example |
|---|---|---|
| -d | Delete a user’s password and make it passwordless. So, practically, the user will not be able to login at all. |
passwd -d myuser |
| -l | Locks the password of an account, so that the user can not be logged in using password authentication system. But, other authentication methods, such as SSH key can be used. |
passwd -l root Locks the root user. |
| -S | Shows the status of a user. (All information from /etc/shadow file) |
passwd -S myuser |
| -a | Shows status for all users. Can only be used with -S parameter. |
passwd -S -a |
We shall be needing the concepts of passwd for our upcoming series of VPS setup.
#2: Modifying existing Groups & Users:
Now, that we have learnt about creating groups and users, we might want to modify them as well. Luckily the commands for modification are very straight forward and accepts all the parameters from the groupadd or useradd commands. Let us take a quick look.
#2.1: Modifying existing Groups (groupmod):
Simple Command:
To change a group name from “mygroup” to “yourgroup“, we would simply use:
groupmod -n yourgroup mygroup
Parameters:
The only new parameter introduced here is -n. It defines the new name. All of the other parameters of groupadd holds true.
#2.2: Modifying existing Users (usermod):
Simple Command:
To change the login of “myuser” to “youruser” and name to “Your User” and ID to 3000 and also append to the adm group we would use this:
usermod -l youruser -c "Your User" -u 3000 -G adm -a myuser
Parameters:
Two new introduced parameters are:
- -l : Specify the new login name.
- -a : If used with -G, then all the groups which are not in the current list of user’s supplementary groups will be appended to the existing ones. Otherwise, the user will be removed from the groups which is not listed (with -G).
#3: Deleting existing Groups & Users:
Deleting groups and users is perhaps the easiest of all. Let us see.
#3.1: Deleting existing Groups (groupdel):
Simple Command:
To delete a group “mygroup” we simply execute:
groupdel mygroup
Note that, if the group is a primary group of a user, then we need to delete the user first before deleting the group. If the group is a supplementary group of some users, then the group will be deleted safely (ie, it will also remove users from the group automatically).
#3.2: Deleting existing Users (userdel):
Simple Command:
To simply delete an user “myuser” we would do:
userdel myuser
This will delete the user but will not remove its home directory and other files. Also, user will not be deleted and a warning will be shown if s/he is currently logged in.
Parameters:
| Parameter | Usage | Example |
|---|---|---|
| -f | This option forces the removal of the user account, even if the user is still logged in. It also forces userdel to remove the user’s home directory and mail spool, even if another user uses the same home directory or if the mail spool is not owned by the specified user. |
userdel -f myuser |
| -r | All files and directories inside the user’s home directory will be removed along with mail spool. |
userdel -r myuser |
#4: Some other concepts:
#4.1: Recommended commands for debian/ubuntu system:
Although useradd and userdel will work for Ubuntu or other debian system, but it is recommended to use the following commands instead.
- For adding users/groups: adduser , addgroup
- For deleting users/group: deluser , delgroup
The rest of the commands hold true for all systems.
#4.2: Sudoer group and users:
For a user to be able to use the sudo command, s/he should be listed under the system group sudo. We can do this simply by executing the following command:
usermod -G sudo -a myuser
It is also recommended to add the user to the administrative group adm to use full advantage of administration. So, the proper command will be:
usermod -G sudo,adm -a myuser
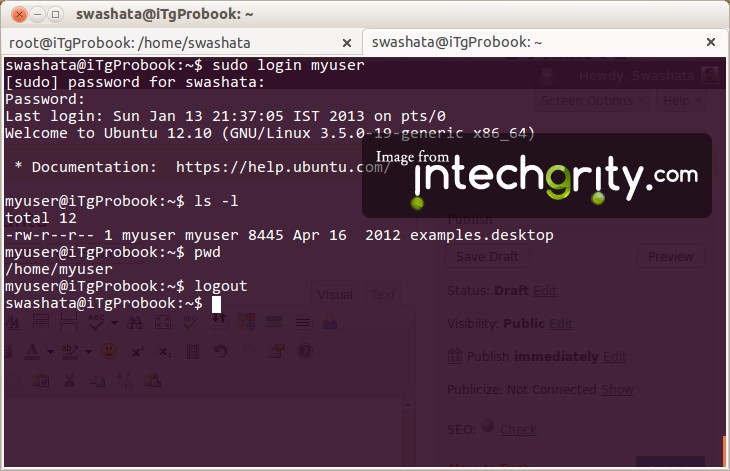
#4.3: Loggin in through shell:
Simply execute in a terminal:
login myuser
It will prompt for the password. Once entered correctly, it will login to the corresponding user. Once done, we can simply execute logout to exit the login shell.
#4.4: Easy way to check the groups of a user
We use the groups command.
groups myuser
So, that was all about users and management. The next in this series will be about File and Directory permission and related commands. So stay tuned, and if you have any trouble, feel free to ask through the comments.

Pingback: Understand File and Directory Permissions in Linux -Concepts & Viewing
nice its useful of them