- How to: SSH into your webhost using cPanel credentials through Linux Console
- SSH to WebHost using public/private SSH keys login generated by cPanel
- Howto: Generate SSH Keys on your local computer and use with the Server
- System, Network & Disk management Linux commands you should know to manage your web server
- Common directory and file management commands in Linux
- User and Group Management in Linux – System Administration & Advanced Concepts
- Understand File and Directory Permissions in Linux – Concept and Viewing
- Change File and Directory Permissions in Linux – Terminal Commands
 So we are back on a better server. Moving our WordPress sites from one server to another, proved to be a charm using SSH (Tutorial on that coming soon). Personally I’ve been using Linux since a long time and because of that, I did not find any problem SSHing into my server and move files and database remotely (without downloading gigabytes of data into my computer). But for beginner users, it might become a little difficult to understand how to connect to the remote servers using SSH and how to automate the process so it saves you from typing the password again and again and have secure access to your server only through your computer using keys. With the help of cPanel, we can automate the whole process with just a few clicks. Let us see how we can do this. But before, we shall look into the concepts of SSH:
#0: What is SSH:
SSH stands for Secure SHell. In practice it gives you a terminal access to your remote host so that you can execute your command there from another machine. For example, suppose we want to move all the files inside directory a to directory b. Then we can either FTP into our host and do a move of all the files or, we can simply SSH into our host and type the following linux command:
mv a/* b/
Sounds pretty cool right? But to do that, we need to know how to connect to the server through SSH tunnel. Let us see how. Please note that we have assumed:
- Your webhosting server gives you SSH access.
- The default SSH username password is same as the cPanel username and password. This is common in most of the cases.
- You are using Linux as your Operating System. Although many SSH clients are available in other OSes but we are concerned only with Linux and OpenSSH installed by default in most of the distros.
#1: Simplest Password based SSH:
All Linux distros come with SSH installed. So, in most of the cases, you don’t have to do anything to get the ssh command working. If you are using windows, I’ve heard that putty works good there, but haven’t ever tested. You can try it at your own. So, having the ssh utility at your hand, a connection to your server can be made using a few commands. There are a few things to note although:
- The SSH connection will be initiated by user@domain.com where user corresponds to your cPanel user and domain.com corresponds to your primary domain.
- You will need the port number where the SSH listens to. In standard setup it is 22. But in most of the shared servers, the port number changes.
- You will need to have a SSH utility. In Linux distros we have OpenSSH installed by default (in most of the cases). For windows you can try the above mentioned app.
#2: Creating the connection using ssh command:
ssh -p <port_number> user@domain.com
Obviously you will need to replace
- <port_number> : With the port number your host provides to connect to SSH. You need to contact them in order to get running.
- user: This is generally your cPanel user name.
- domain.com : This is generally your cPanel main domain name.
If you are not using cPanel thought and using an unmanaged VPS, then all these information should have been given to you already by your webhost. If not, then contact them and get the credentials.
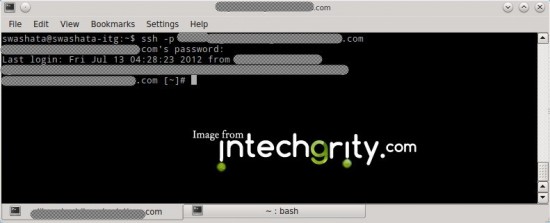
So, if my port number is 22 (which is a standard/common setup), username is swashata and domain is swashata.com, then I would run the following command:
ssh -p 22 swashata@swashata.com
After this, it will prompt for your password. Enter your password (which is generally the cPanel password) and the output will be something like this:

Some texts have been censored
Easy enough?
#3: Executing your command on SSH:
After logging in, you are given a Linux shell where you can execute commands you want. We shall see more on this in future articles of this series. The first thing you might want to know is, what kind of shell is given to you. The simplest command would be:
echo $0
It can output several things including:
- /bin/bash : The most common bash shell. All the commands should run here.
- /bin/sh : sh shell. It is a bit old but no reasons why it should not work for you. Try asking your host to update to latest bash.
- jailshell : This is the jailshell which is used in case of shared servers. All the commands which requires only current user’s permission should run. But you will not have root access to the server itself. In practice, you are “jailed” inside your home directory.
#4: Logging out:
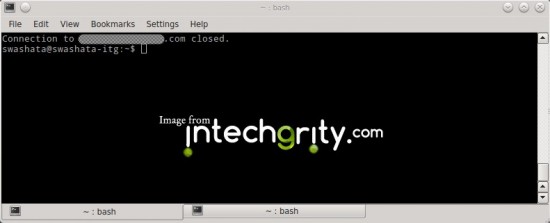
The best way to logout from a remote ssh connection is to execute the following command:
logout

It will log you out from SSH and will end the current session. So, if you want to log in again, then you have to type the command again.
#5: Creating a shortcut for execution:
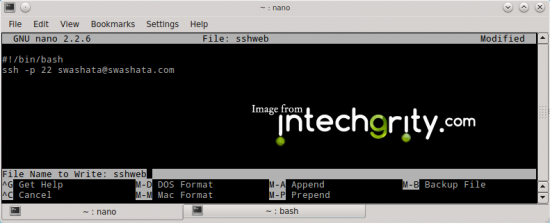
For shortcut, we shall create an executable file which will automatically execute the commands under bash. To start with, let us create a file named sshweb under our home directory.
nano sshweb
This should bring you a terminal based editor. Write the following text inside it.
#!/bin/bash
ssh -p 22 user@domain.com
Obviously you will need to change the port, user and domain as mentioned above. Now save the file pressing Ctrl+O and hitting enter.
Once done, hit Ctrl + X to edit nano.

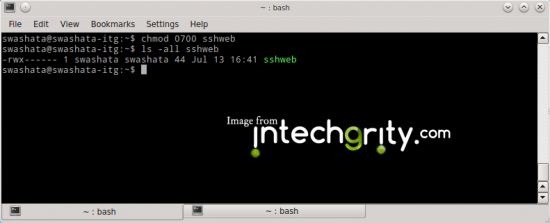
Now, we would make the file (sshweb) executable only by our own user. To do that, simply enter the chmod command as follows:
chmod 0700 sshweb
ls -all sshweb
This should give you the similar output which means, permission is set properly. (Read, Write, eXecute for the owner, none for others)

Now to execute it, simply type
./sshweb
from the directory where the sshweb file lies (If you did not change the working directory, then it is generally your user’s home directory) and you will be connected to your server.
So that was all about the simplest method to log into SSH using your cPanel username and password. In the next series, we shall see how to automate the connection using Public/Private key pair obtained from cPanel and importing to your own computer’s ssh configuration. If you have any doubt with this or want to say about the SSH utility you use, please do so in the comment.


Pingback: Generate SSH Keys on your local computer and use with the Web Server
Pingback: Securing your Ubuntu VPS and Creating Users - Ubuntu VPS Setup # Part1