- How to: SSH into your webhost using cPanel credentials through Linux Console
- SSH to WebHost using public/private SSH keys login generated by cPanel
- Howto: Generate SSH Keys on your local computer and use with the Server
- System, Network & Disk management Linux commands you should know to manage your web server
- Common directory and file management commands in Linux
- User and Group Management in Linux – System Administration & Advanced Concepts
- Understand File and Directory Permissions in Linux – Concept and Viewing
- Change File and Directory Permissions in Linux – Terminal Commands
 On our earlier tutorial we’ve seen how we can login to our webhost through SSH tunnel using our cPanel username and password. Let us now see, how we can use the public/private pairs for SSH keys login, which we shall be generating using cPanel. SSH key authentication is more preferable than normal login, because it saves you from typing your password and you can also encrypt the keys using your own unique pass-phrase. So, even if your keys get lost, your SSH authentication will be safe with your pass-phrase. Let us now see, how to generate keys and use it with own Linux Computer Terminal to securely SSH into your WebHost. By the end of this tutorial you will be able to:
- Understand the concept of the public/private keys and the authentication protocol.
- Generate the key pair from your cPanel and make them authorized for using with your computer.
- Automate the login process without having to type the command (using an executable bash script).
Let’s start.
#1: The concept of the keys:
SSH authorization can be done using two keys, Private and Public.
- Public : This is a file (named generally id_dsa.pub) which resides both your machine and on your server. On the contrary it can be given to any SSH server you wish to connect to. When an SSH server sees you requesting for a connection, with the help of your public key, it sends you a key challenge.
- Private : This is another file (named generally id_dsa) which resides only on your machine. After you receive the key challenge from the server holding your public key, your SSH client uses the private key to respond to the challenge. With the proper combination of private key and pass-phrase only, you can authenticate to the SSH server.
So, in nutshell, your computer should have both the Private/Public key pair whereas, the remote computer (or the WebHost) should have only the public key. Then, you use your SSH client with the keys, to connect to the remote computer.
Sounds easy enough? If you are willing to get more in-depth knowledge, then I would recommend reading this article at archlinux. Now, we shall see how we can use the cPanel to generate the keys for us. In the next article of this series, we will see how to use ssh-keygen to do all these things.
#2: Using cPanel to generate the keys:

First login to your cPanel and under the Security > SSH/Shell Access you will find the SSH portal. (As show in the image above).

Now go to Manage SSH Keys from the portal. This will lead you to a new page from where you can generate and/or import SSH keys.
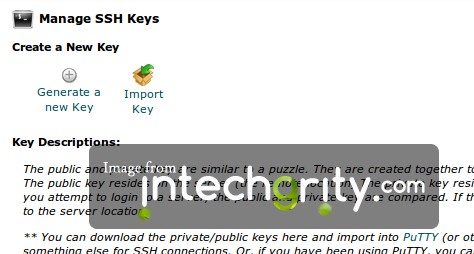
Click on the Generate a new Key button. This will give you a form which you need to submit in order to generate the public/private key pair.
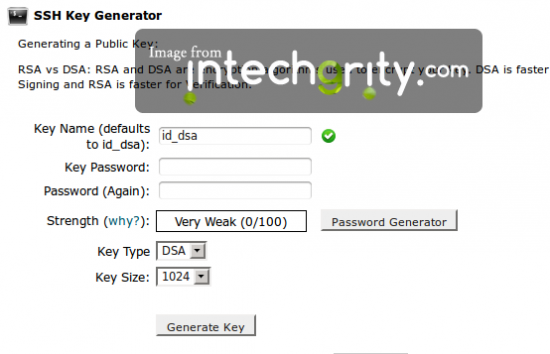
Once this is done, you will need to authenticate the public key in your server.

To do so, simply from the Manage SSH Keys table, click on the Manage Authorization.

Then simply click on the Authorize button and you are done.
#3: Downloading and using the keys:
At this point we have our key pair ready to be used with SSH.
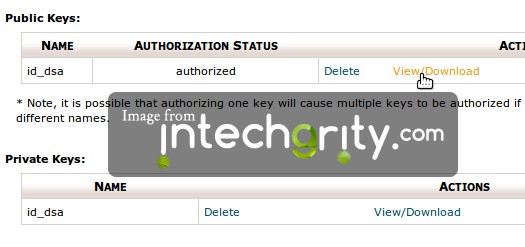
Simply go to the Manage SSH Keys and from the table download both the files.
Now we need to move the key files to a new place, inside the .ssh directory of our home directory. To do so, open up a terminal and enter the similar command.
mv path/to/keys ~/.ssh/keys
Where, obviously you need to change the key paths. Suppose our keys are downloaded in the Download directory. Then the commands would be:
mv ~/Downloads/id_dsa* ~/.ssh/
This should move both the files, id_dsa and id_dsa.pub to the .ssh directory of your home directory. To check, use the list command.
ls .ssh
This should output something like this:
id_dsa id_dsa.pub
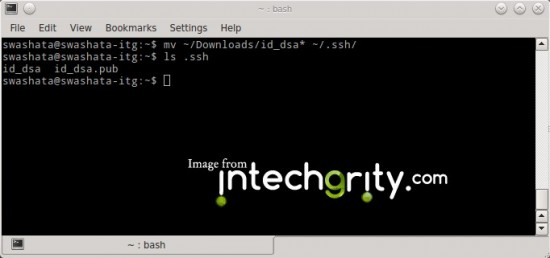
Which means both the files are residing in .ssh directory.
#4: Changing the permissions of the keys:
The private key should be protected and if we do not set the proper permission, then we will not able to use it. If we do a
ls -l .ssh
Then the output might come something like this:
-rw-rw-r-- 1 swashata swashata 736 Jul 16 13:01 id_dsa
-rw-rw-r-- 1 swashata swashata 618 Jul 16 13:01 id_dsa.pub
Which means, our key files are readable/writeable by both the owner and the group. We should change the permission so that, only the owner can read/write the key and no one else. To do so, we use the chmod command. We need to change the permission of only the private key. Theoretically only the owner should be able to access it. Otherwise it can compromise your authentication security. But we shall also change the permission of the public key for more safety.
chmod 600 .ssh/id_dsa*
Now if we do a
ls -l .ssh
Then, the output should be:
-rw------- 1 swashata swashata 736 Jul 16 13:01 id_dsa
-rw------- 1 swashata swashata 618 Jul 16 13:01 id_dsa.pub
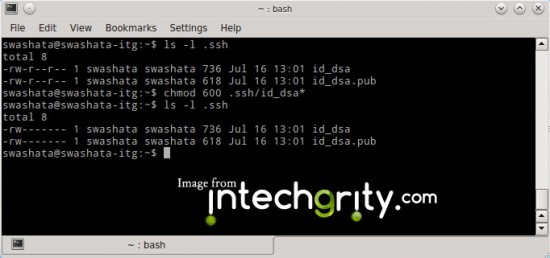
Which means, our key files are now secured.
#5: SSH using the keys:
So finally everything is set. Now to SSH, we need to:
ssh user@domain.com -p <port_number>
Where the syntax holds usual meaning from our previous discussion.
Recommended Reading: SSH using Username/Password through Linux Console
For example, if my user name is swashata and host is swashata.com and port is 22, then I would connect using:
ssh swashata@swashata.com -p 22
This might ask you to add the host on the list of know hosts, where you just need to reply with yes. This will also ask you for the passphrase which is the same you had used while creating the key from cPanel.
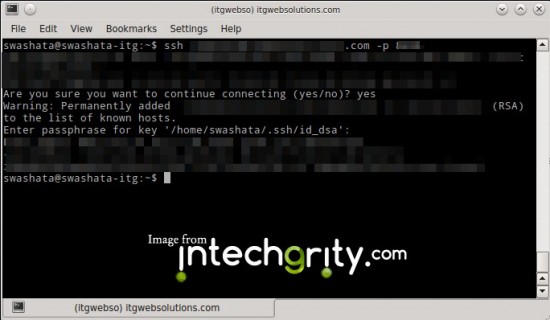
As you can see, the authentication will not ask you for your user account password, but rather will ask you only the passphrase with which, your keys should be safe.
#6: Creating a shortcut:
This is same as before. Just create a file (sshweb) with the bash command
#!/bin/bash
ssh -p 22 user@domain.com
Make the file executable:
chmod 0700 sshweb
And for connecting, simply call the file.
#7: Conclusion:
So, that was all about using the key pair authentication to SSH into your webhost. In the next article, we shall see how we can generate keys on our own and copy the public key to the server for authentication. If you have any doubt with this, or just want to say hello, please do so in the comments.
