- Introduction to VVV based WordPress Development
- Installing Needed Software to run VVV on Windows
- Installing Varying Vagrants Vagrant on Windows 10 64bit
- NFS based file sharing for Varying Vagrant under Windows
Now that all software required to run VVV are installed, we will now proceed to install VVV itself.
Install Needed Vagrant Plugins
- Open up your ConEmu as Admin.
- Now run the following two commands.
vagrant plugin install vagrant-hostsupdater
vagrant plugin install vagrant-triggers
vagrant plugin install vagrant-faster
This will install the following vagrant plugins
- Vagrant::Hostupdater – This adds entry to your hosts file for easy network management.
- Vagrant::Triggers – Used by VVV to run backups when you close your vagrant.
- Vagrant::Faster – Makes the vagrant faster by allocating more RAM and CPU.
Install VVV
Finally the moment has arrived. For this series, we will assume that
- We will be using GIT Bash with ConEmu only.
- We will install VVV inside
/d/vvvdirectory.- In my machine,
d(orD:\) is a SSD partition where I keep all my development stuff. - This gives super-fast experience with Sublime and almost anything.
- For simplicity, I open ConEmu under
/dand navigate there-on.
- In my machine,
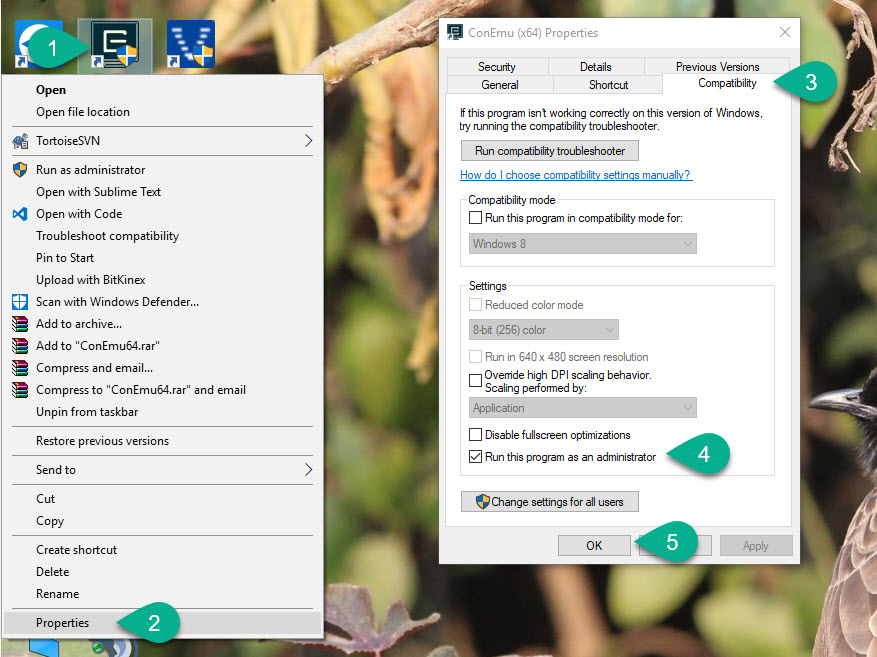
- We will always run ConEmu as Administrator.
- Right click on the ConEmu shortcut.
- Go to Properties.
- Go to Compatibility.
- Check the box that says “Run this program as administrator.
Create directory
Open ConEmu.
CD to /d.
cd /d
Create vvv directory.
mkdir vvv
CD to vvv.
cd vvv
Clone VVV Repository
Now we will actually install VVV inside our vvv directory. In the prompt we are already at /d/vvv. Now run the following command.
git clone -b master git://github.com/Varying-Vagrant-Vagrants/VVV.git
Once it is cloned, run the following command to install VVV.
vagrant up
Now just sit back and relax and see as VVV downloads some stuff and installs Ubuntu 14.04 (at the time of writing) along with a bunch of packages.
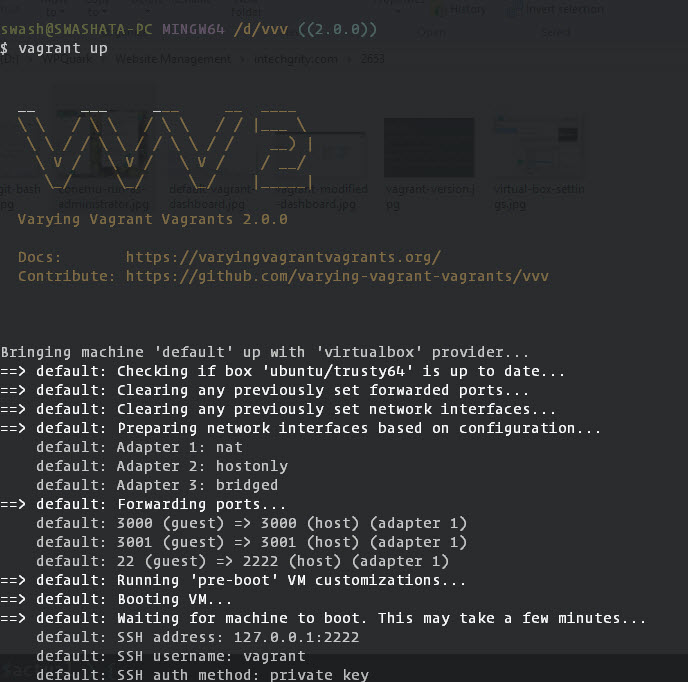
For me this took over 20 mins, but it may vary depending on your machine and network.
Working with Varying Vagrant
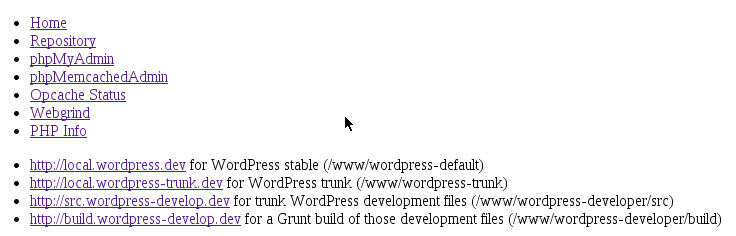
Now that everything is installed, open up your browser and go to http://vvv.dev/. You should see a webpage something like this.
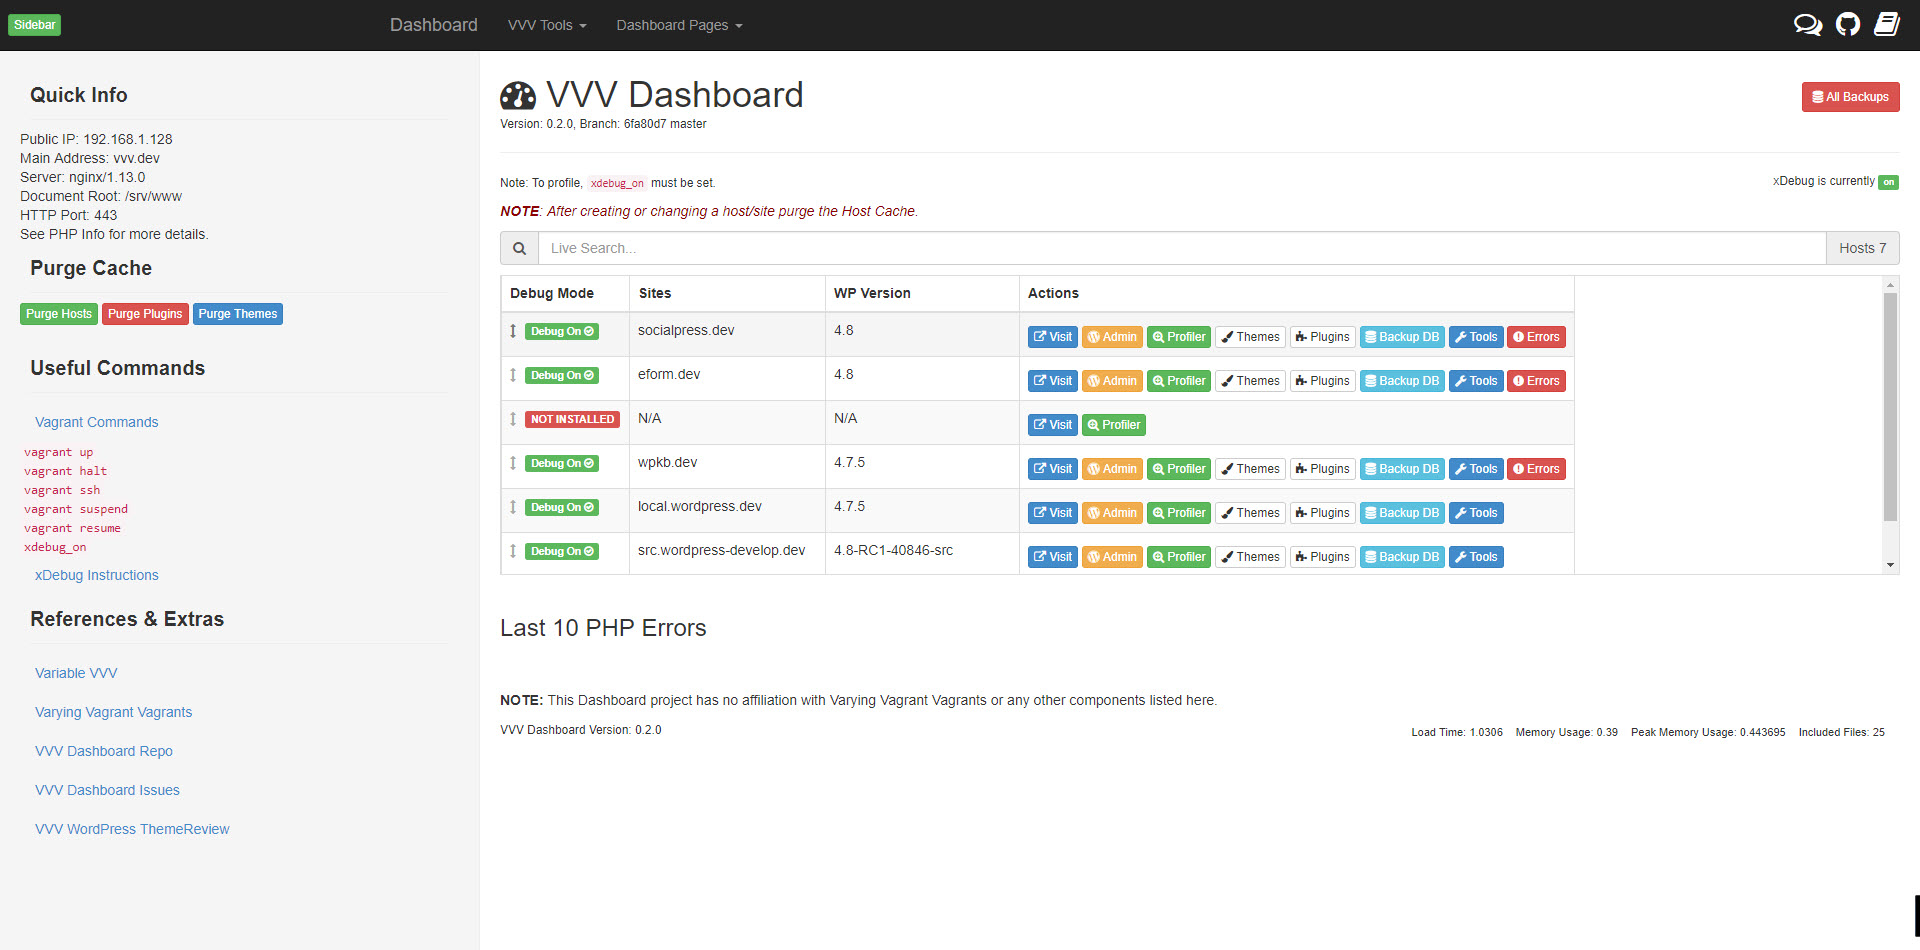
But wait, this is not really what you see isn’t it? Don’t worry you need to learn that as a part of your homework (I did say something about homework, didn’t I?). For now, what you see could be something like this.
Workflow with Vagrant
As you might have guessed, vagrant workflow is based on Shared Directory Structure.
- You develop in the
/d/vvv/www/wordpress-default/public_html/directory where all the source code resides. - So go figure how to add this directory as project to your favorite editor.
- Create a bunch of plugins and themes (overnight, if possible, just to see how awesome this is).
- Test them from http://local.wordpress.dev/.
- Start wondering how easy it was to set everything up.
But we are not done yet. Who really develops all plugins and themes under the same WordPress installation? (Honestly I used to do that, before vvv, but not anymore). So for this, we need different WordPress installations and different addresses, like http://eform.dev, http://wpkb.dev, right, Right!? Enter Variable Vagrant.
As of Vagrant 2.0.0, Variable VV doesn’t work good with vagrant anymore. The good news is, vagrant now has a built-in way to install additional sites without much hassle. Please follow the official guide.
(Deprecated) Install Variable VVV
Variable VVV is basically a tool or wizard to seamlessly create VVV sites straight from command line.
Get Variable VVV files
CD to /d.
cd /d
Create vv directory.
mkdir vv
Clone the git repository.
cd vv
git clone https://github.com/bradp/vv.git
Add Variable VVV to executable PATH
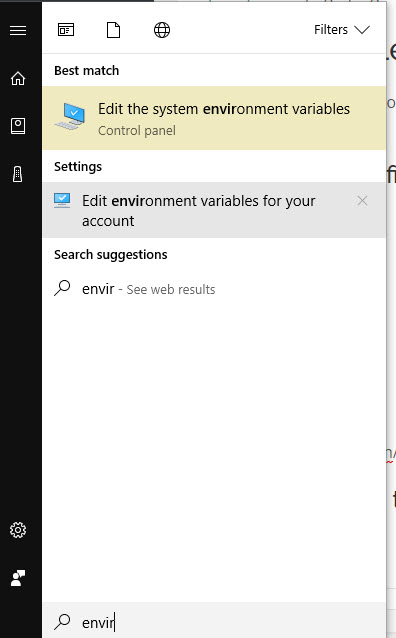
- Open Startmenu and start typing
environment. - Click and open
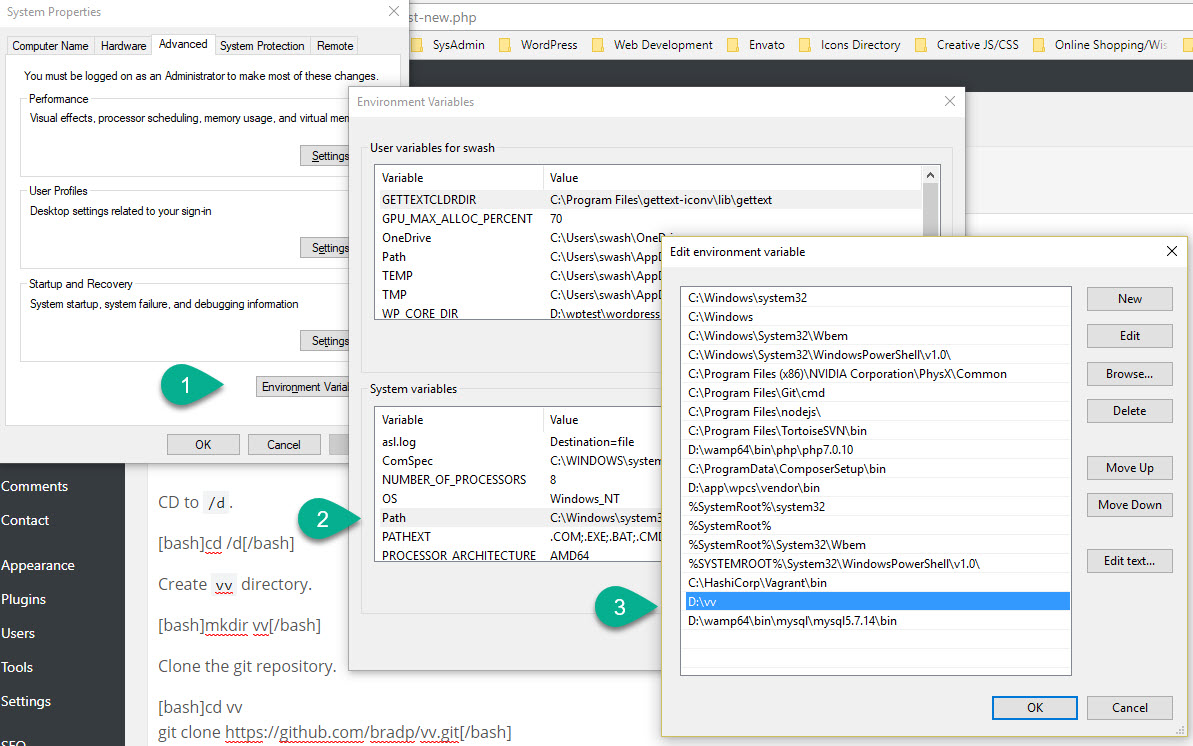
Edit the system environment variables. - Click Environment Variable.
- Under System Variables, double click on Path.
- Add
D:\vvto the list.
Now restart (close and open again really) your ConEmu and type in
vv list
This should give you similar output.
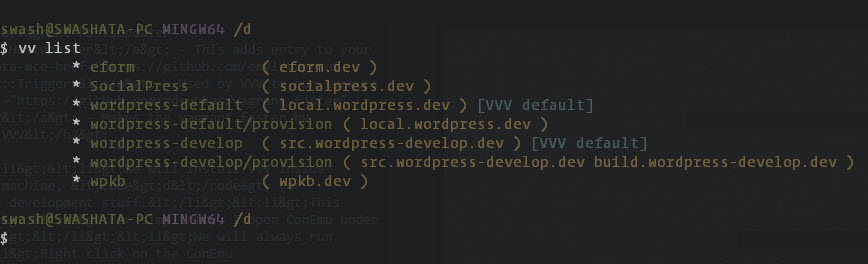
This means you are all set to go.
Create a new site with VV
Now type in a command to create a new site for your awesome plugin, say xyz.
cd vvv
vagrant halt
vv create
Note that we intentionally halt vvv before creating, because this is needed.
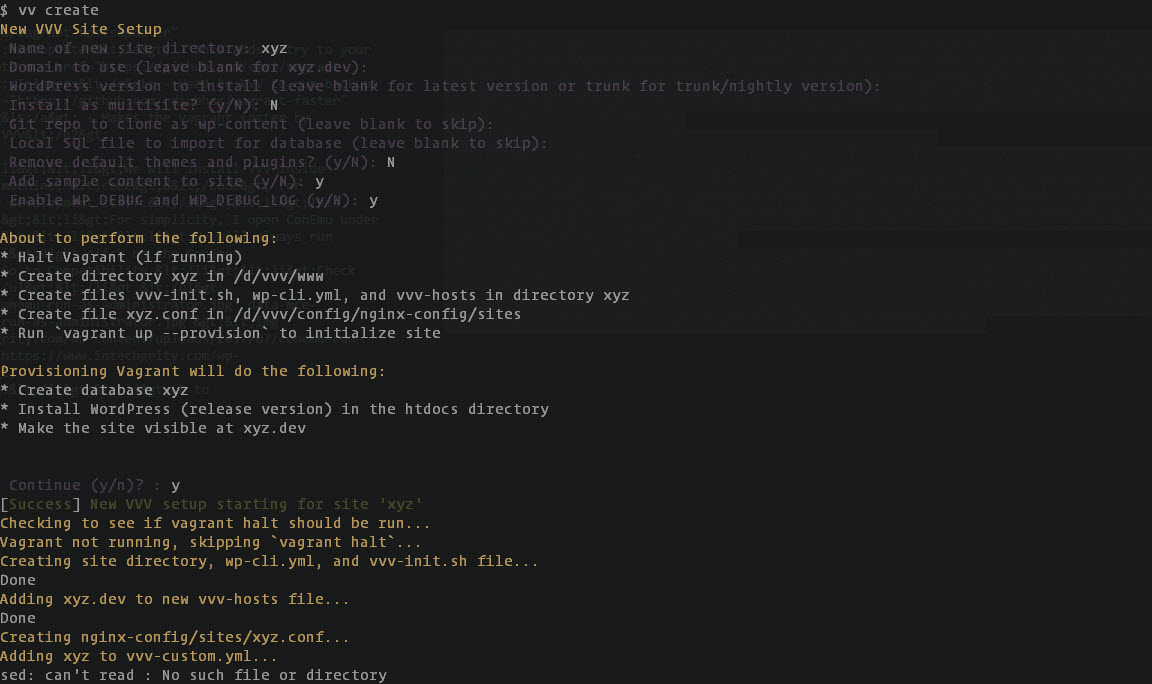
Now go through the wizard and enter as prompted. Once done, this will automatically provision your vagrant to get the site up and running. Now access your new sites under http://xyz.dev and edit the files at /d/vvv/www/xyz/htdocs/public_html.
So that was the basics of VVV with VV workflow for your custom development. Next in this series we will see some networking and file sharing tips and hacks to run everything as smoothly as possible under Windows.
