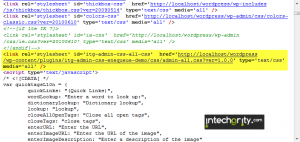
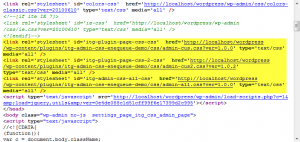
 So, you have got a cool new plugin with a dashing settings page. You have your very own HTML structure and CSS as well to style them… But, you are confused how to tell WordPress to include the StyleSheet in the admin page head?
Well, this happened with me also. The primary solution I thought of was either include the CSS inside <style> tag or use admin_head hook to output (echo to be precise) the <link> to the CSS file. It worked for sure, but the problem was
- For style tag, I need to know the directory where the plugin is, to properly output my images. Its easy for default WP directory structure, but will not work for WP installations with custom directory.
- For admin_head hook, the stylesheet will get loaded on all the pages and may conflict with other plugin’s CSS. I really did not want this to happen.
So, I digged a little bit and after looking into the WordPress codex found the perfect solution for this. Here is how to do this in the perfect way:
#0: How to add CSS to all the Admin Pages:
Just in case, you want to enqueue your CSS to the whole admin panel, I thought of putting this example as well. You have already developed a WordPress Plugin, so I don’t have to explain every bits of the code. Here is a sample example, how to print your StyleSheet to the whole admin panel or WordPress…
/**
 * Lets start with a General CSS Inclusion
 * We will use admin_head hook to enqueue our CSS file
 * This will print the CSS to all the admin pages
 */

/**
 * First the enqueue function
 */
function itg_admin_css_all_page() {
    /**
     * Register the style handle
     */
    wp_register_style($handle = 'itg-admin-css-all', $src = plugins_url('css/admin-all.css', __FILE__), $deps = array(), $ver = '1.0.0', $media = 'all');

    /**
     * Now enqueue it
     */
    wp_enqueue_style('itg-admin-css-all');
}

/**
 * Finally hook the itg_admin_css_all_page to admin_print_styles
 * As it is done during the init of the admin page, so the enqueue gets executed.
 * This can also be attached to the admin_init, or admin_menu hook
 */
add_action('admin_print_styles', 'itg_admin_css_all_page');
Pretty easy right? What we have done is:
- Used a function itg_admin_css_all_page to register our StyleSheet and enqueue it.
- Added an action to the admin_print_styles hook, to execute that function.
And we are all set! This will print your CSS file to the Admin Panel.
#1: A little about the enqueue and register functions:
You can see we have passed several parameters to the function wp_register_style and wp_enqueue_style. Both of them use the same parameters with some difference:
- wp_register_style registers the stylesheet but does not print it. If registered, then it can be called anytime and anywhere from your plugin. This is also useful if some of your StyleSheets depends on other stylesheets. Then the dependencies have to be registered first. Then all of the must be enqueued with their dependencies specified in proper manner. If you are thinking how this dependencies work, then we are getting to that soon!
- wp_enqueue_style either prints a previously registered style or registers if not already. Same parameters can be passed through. But it is recommended to use register_style first and then enqueue_style.
Parameter lists:
- handle: The name of the registered stylesheet. This is used in enqueue_style to print the sheet.
- src: The location of the CSS file. Note that we have used here intelligently the plugins_url API. You can read more about it here.
- deps: The dependencies. The values are written as a form of array. Say, you have sheet2 which depends on sheet1 and sheet0. Then pass them as array(‘sheet0’, ‘sheet1’).
- ver: The version of the stylesheet. This will add a query parameter to the CSS file. [http://your.host/wp-include/plugins/your-plugin/css/style.css?ver=1.0.1] This ensures that if you update the version then the user gets the new CSS, instead of caching.
- media: The CSS media attribute.
Seems great right? Now lets see how we enqueue our CSS to a specific plugin page.
#2: How to add CSS to your specific Plugin Settings page:
By now, you should be knowing how to add your own plugin page using API’s like add_options_page add_menu_page etc. If not, then this is the best place for you to start. Lets see how we add a settings page and link a CSS. Have a look into this code:
<?php
/**
* Now add our own Settings page
* Also attach another CSS file there
*/
/**
* The function to print the page
*/
function itg_admin_css_custom_settings_page() {
?>
<div class="wrap">
<h2>Welcome to the Custom CSS Page demo</h2>
<small>Demo Plugin developed by <a href="http://www.swashata.me">Swashata</a> | <a href="http://www.intechgrity.com">InTechgrity</a></small>
<?php
if($_SERVER['REQUEST_METHOD'] == 'POST') {
?>
<div class="updated fade">Hi <span class="big_red"><?php echo $_POST['your_name']; ?></span>! See we got your name.</div>
<?php
}
?>
<form method="post" action="">
<ul>
<li>Howdy! Would you like to enter your name??!</li>
<li><label for="your_name">Your name please »</label> <input id="your_name" name="your_name" value="..." type="text" /></li>
<li><input type="submit" class="button-primary" value="Submit Name" /></li>
</ul>
</form>
</div>
<?php
}
/**
* The enqueue function
* Registers and enqueue the CSS
*/
function itg_admin_css_custom_page() {
/** Register */
wp_register_style('itg-plugin-page-css', plugins_url('css/admin-cus.css', __FILE__), array(), '1.0.0', 'all');
/** Enqueue */
wp_enqueue_style('itg-plugin-page-css');
/**
* Enqueue without Register
* Just for the sake of demonstration
*/
wp_enqueue_style('itg-plugin-page-css-2', plugins_url('css/admin-cus2.css', __FILE__), array(), '1.0.2', 'all');
}
/**
* The function to hook the enqueue function
* And Add the Menu page
* We can seperate the enqueue but this is the best practice
* Use a little of your head and find out why? ;)
*/
function itg_admin_css_menu_init() {
/** Add options page and get the reference through a variable */
$itg_admin_menu = add_options_page('iTg Admin panel CSS demo', 'itg CSS Admin', 'manage_options', 'itg_css_admin_page', 'itg_admin_css_custom_settings_page');
/**
* Now use the reference to conditionally attach the script
* We will add an action to admin_print_style with conditional tag
* Also we will execute the itg_admin_css_custom_page function which enqueues the CSS
*/
add_action('admin_print_styles-' . $itg_admin_menu, 'itg_admin_css_custom_page');
}
/**
* All done.
* Now hook the itg_admin_css_menu_init to the admin_menu
*/
add_action('admin_menu', 'itg_admin_css_menu_init');
?>
Lets see the sequence of the execution of the functions:
- We add the admin_menu hook with a callback function named itg_admin_css_menu_init
- The itg_admin_css_menu_init function does two thing
Adds up an option page named itg CSS Admin with a callback function itg_admin_css_custom_settings_page
Adds another hook to admin_print_styles in a conditional manner which calls the function itg_admin_css_custom_page. - itg_admin_css_custom_settings_page Generates the plugin settings page.
- itg_admin_css_custom_page Enqueues the styles.
Note that the main thing was ‘admin_print_styles-‘ . $itg_admin_menu which adds the condition to print the style only on the specific page.
For your ease, we have put together a demo plugin which you can download and test. Also check the source code to understand more…
External Resources:
- WordPress Codex: wp_register_style.
- WordPress Codex: wp_enqueue style.
- Using enqueue with conditional IE tag: An advanced technique to include conditional IE tags for CSS hacks.
And that was all. If it was useful for you then do give your feedback. Also if you have any problem then just drop in!


You can always do that (transfer the installer, not the installed game itself) but if the game requires an active internet connection it will not run.
i want to change one specific widget style.
then whats should i do ?
Thank you for these tutorials. I’m beginner. I want your help again please.
So my question is: How can i create comment code in php for my published News??